
How To: Export PDFs from Canva with Crop Marks & Bleeds
If you are working in Canva, it is important to know how to export your designs in a format that will work for your printer. From flattening to crop marks, in this guide I will show you how to export designs for professional printing.
Exporting A PDF From Canva With Print Bleeds & Crop Marks

Step 1:
With your design open in Canva, select File>Settings>Show Print Bleed

Step 2:
Select Share>Download
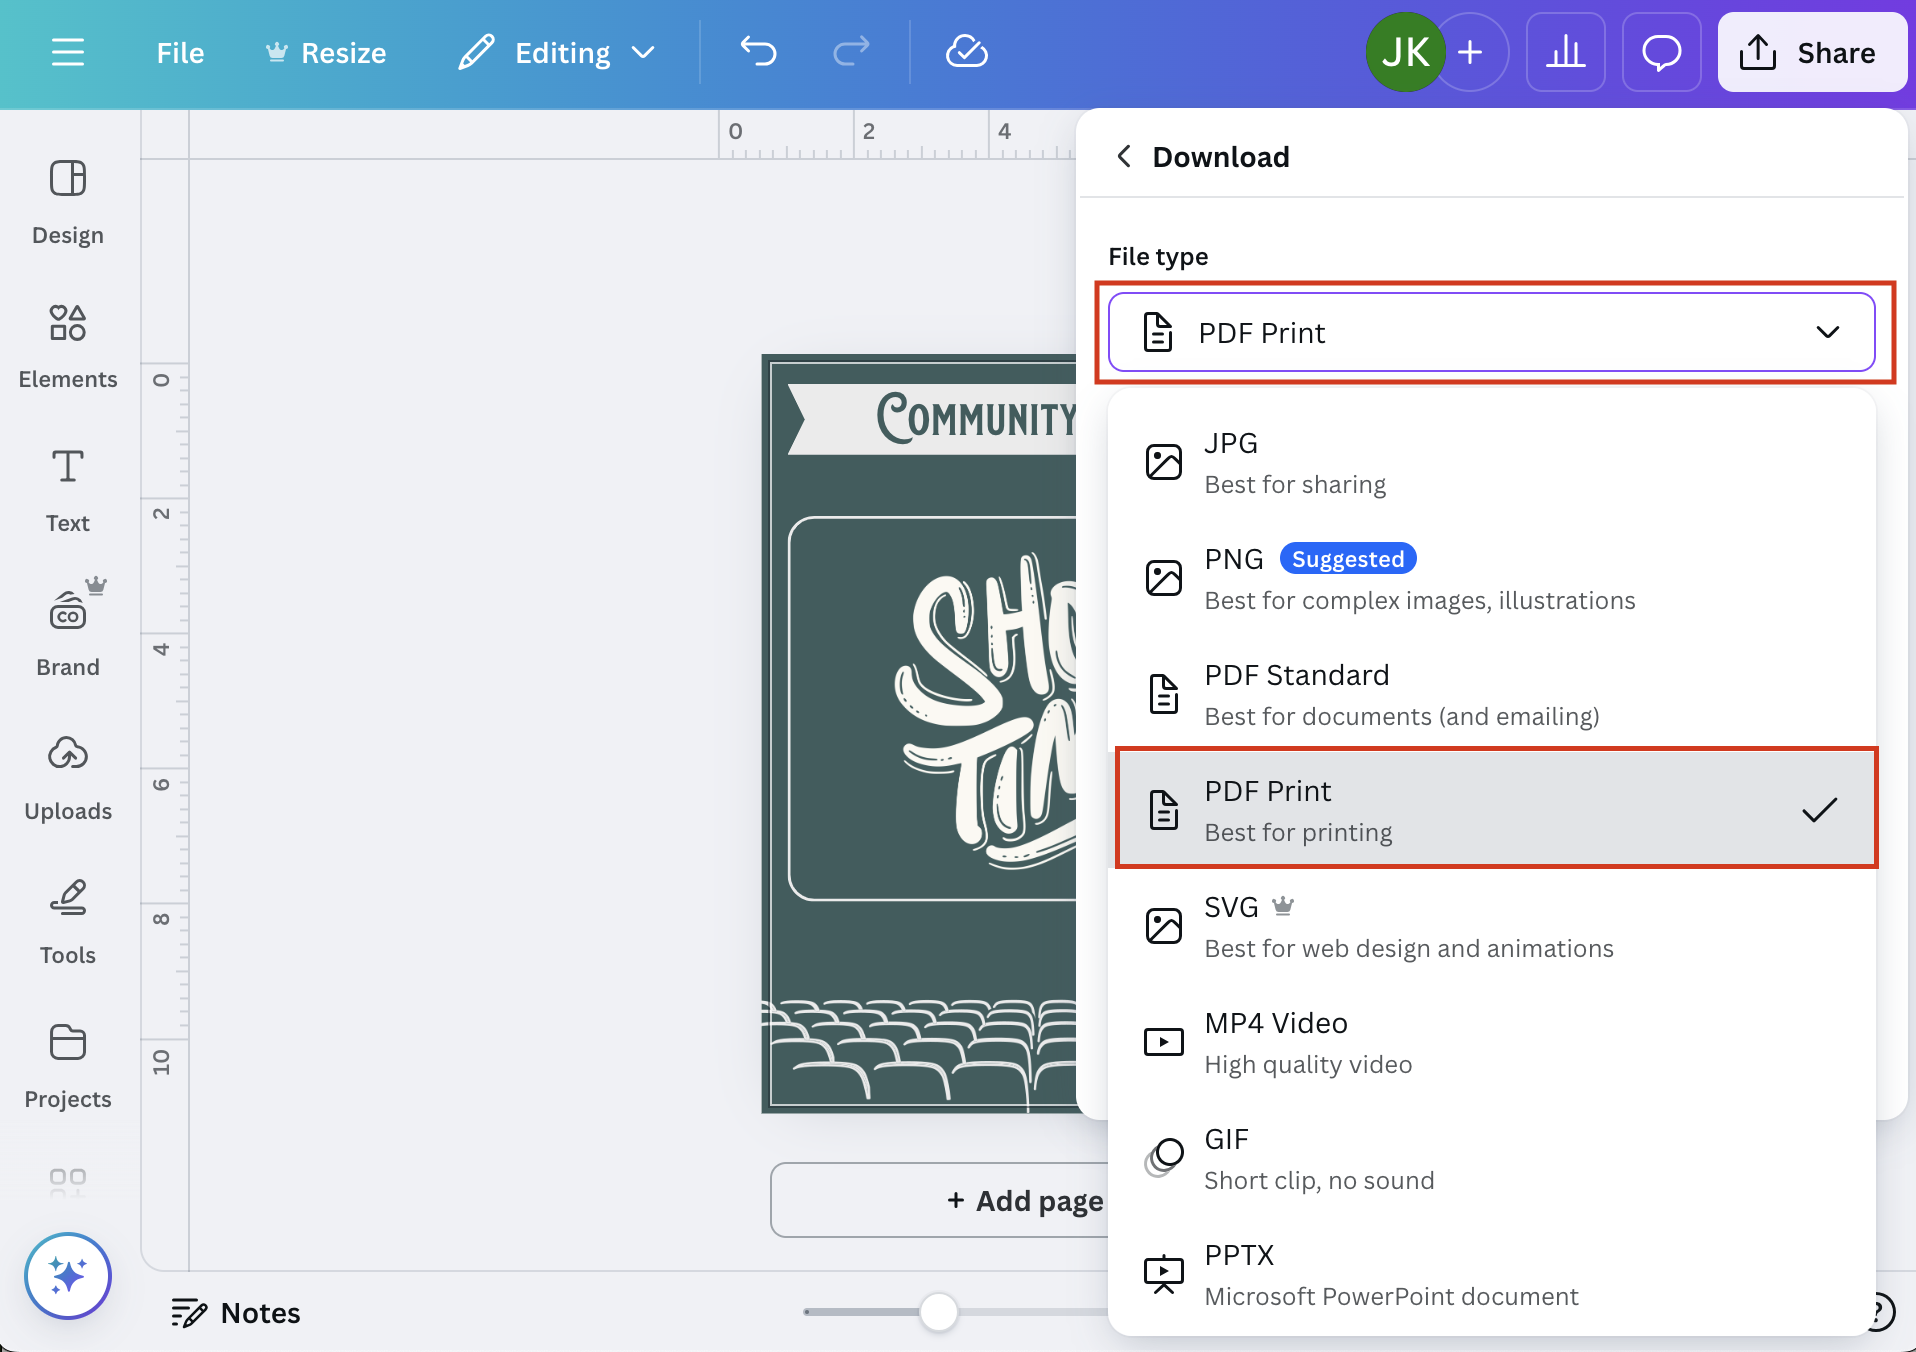
Step 3:
In the download menu, select File Type>PDF Print

Step 4:
Check the boxes for Crop Marks and Bleeds and Flatten PDF (flattening a pdf merges all design elements into one layer and prevents elements from being lost during printing)
Step 4.5:
If you have a Canva Pro account, select CMYK under Color Profile (if you don’t have a Canva Pro account, leave this as RGB)
Step 5: Select Download and save your file where you would like on your computer
Congratulations! Your file (with crop marks and bleeds) is now downloaded and ready to send for printing.